Customize and Deploy Your Chatbot
Last updated on February 27, 2026
Softcery PlatformWe build and advise on production AI systems. Bring your questions to a free intro call.
Talk to usBuild and deploy reliable AI agents with the Softcery Platform.
Get startedYour agent works. Now make it look and feel like your brand, and put it where users can find it. This guide covers branding, channel configuration, and deployment in the Softcery Platform.
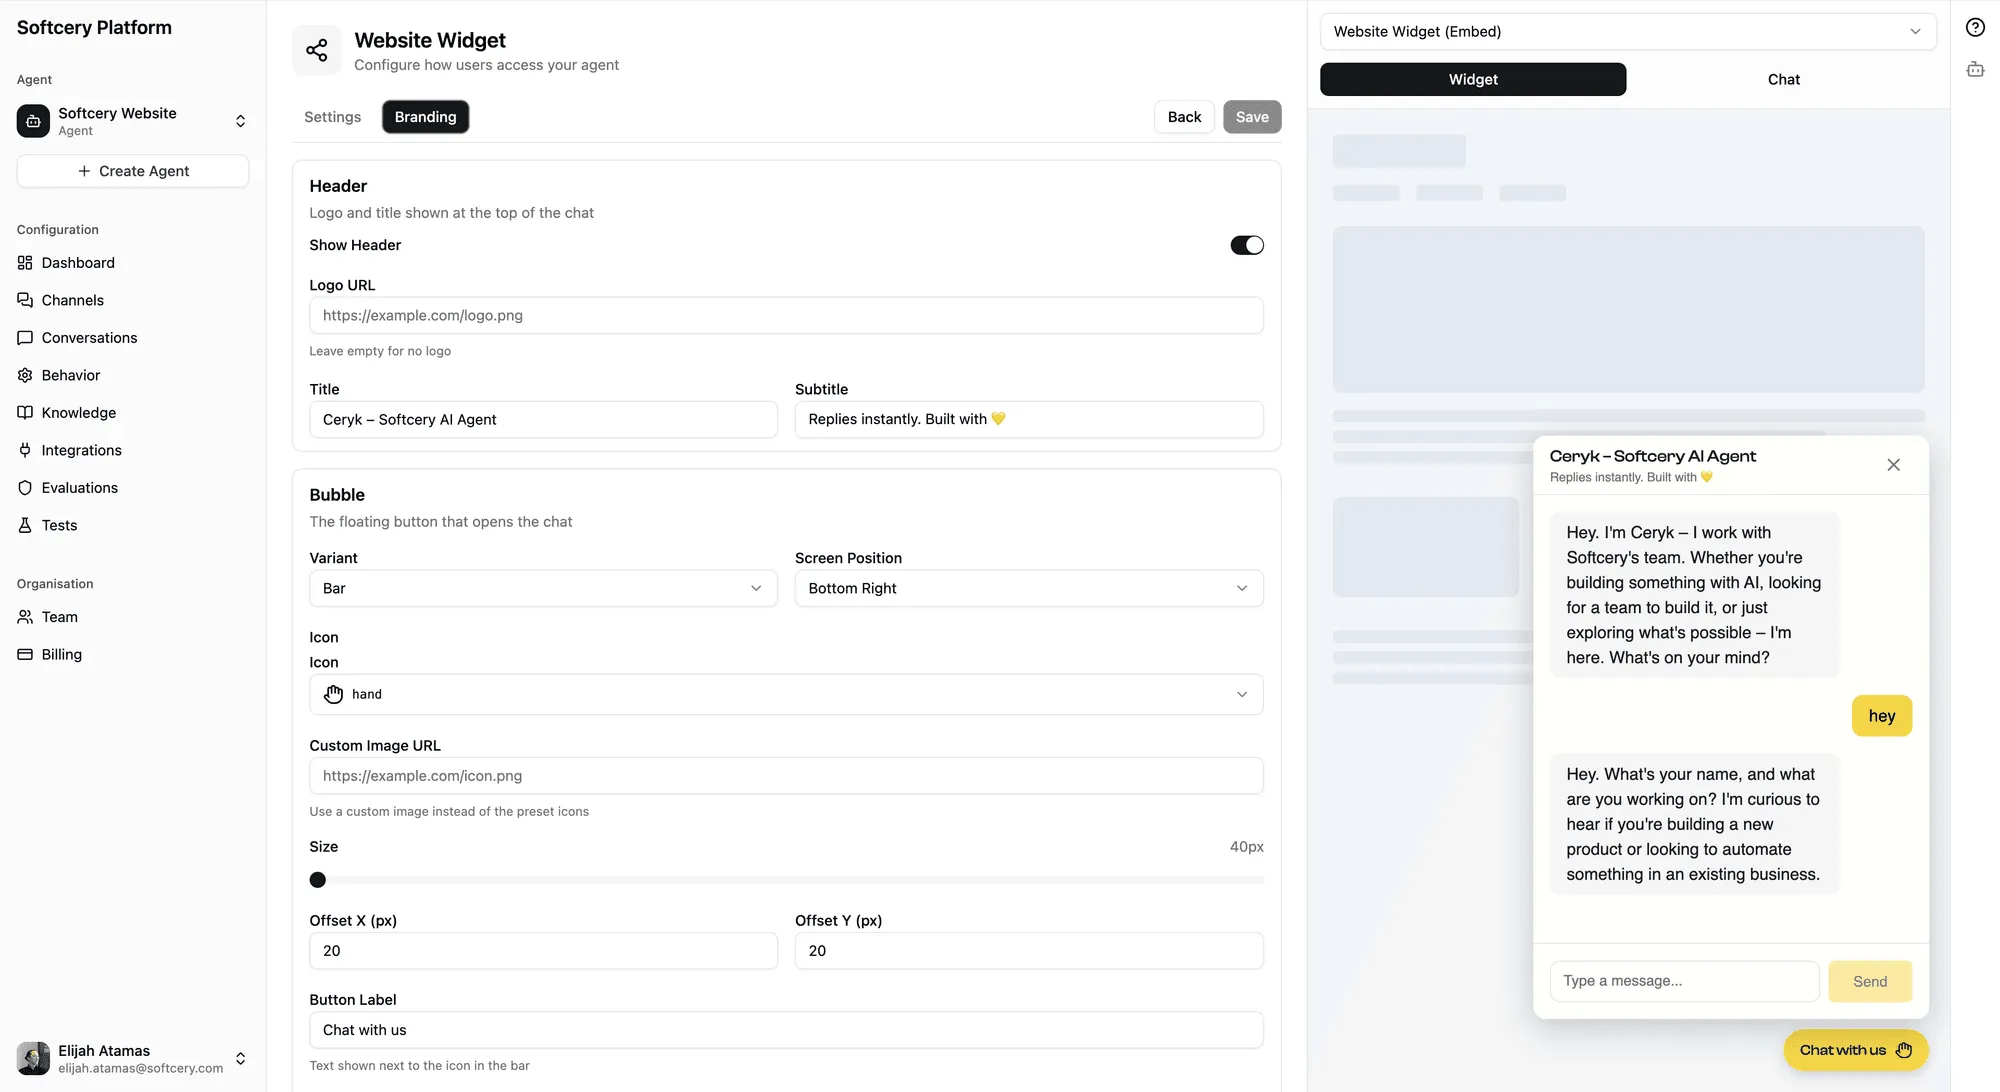
Branding Your Chat Widget
Every channel has its own branding. You can have different looks for different contexts – a professional embed on your main site, a casual one on your blog, a minimal one in your docs.
Colors
Go to your channel’s Branding tab.
Set three colors that match your brand:
- Primary – The main accent color. Used for the send button, chat bubble, header background, and interactive elements. This is the color users notice first.
- Secondary – Supporting color for backgrounds and secondary UI elements.
- Accent – Highlight color for emphasis and focus states.
Enter colors as hex codes (e.g., #2563eb for a clean blue). The platform automatically calculates text contrast – if your primary color is dark, text on it will be light, and vice versa.
Logo and Header
- Logo URL – Point to your logo image. It appears in the chat header next to your title.
- Title – The name shown at the top of the chat panel. Defaults to your agent’s name.
- Subtitle – A brief tagline below the title (e.g., “We typically reply instantly”).
Welcome Message
The first thing users see before typing. Set expectations and invite engagement:
- “Hi! I’m Acme’s support assistant. Ask me anything about our product.”
- “Welcome! I can help you with questions about pricing, features, and getting started.”
- “Hey there – what can I help you with today?”
Keep it short. One or two sentences.
Font
Choose from Google Fonts to match your brand typography. The font applies to all text in the chat interface – messages, header, input field.
Chat Bubble (Embed Channels)
The bubble is the entry point on your website:
Shape:
- Circle – A round floating button. Classic and familiar.
- Bar – A horizontal pill shape. More visible, supports teaser text.
Icon:
- Browse 1,668 Lucide icons – search for “message,” “help,” “headphones,” or whatever fits
- Or provide a custom image URL for your own icon
Size: Adjustable via slider. Bigger = more visible but more intrusive.
Teaser text (bar shape only): Short text next to the bubble, like “Chat with us” or “Need help?”
Chat Panel
Control the chat window dimensions:
- Width – How wide the panel opens (e.g., 400px)
- Height – How tall the panel is (e.g., 600px)
- Border radius – Corner rounding (0 for sharp, higher for rounded)
Live Preview
Every branding change is reflected in the admin preview panel in real-time. Adjust colors, swap icons, change the welcome message – see the result immediately without deploying.
Deploying an Embed Widget
Create the Channel
- Go to Channels → Add Channel → Embed
- Name it descriptively (e.g., “Docs Site Widget” or “Homepage Chat”)
Configure Settings
On the Settings tab:
- Step display – Set to “Minimal” for customer-facing widgets (shows “Searching…” and “Thinking…” indicators) or “None” for a cleaner experience
- Rate limits – Set messages per minute and per hour to prevent abuse
- Allowed origins – Add the domains where this widget will be embedded (CORS protection)
Install the Snippet
On the Install tab, you’ll find a JavaScript snippet:
<script
  src="https://c.platform.softcery.com/loader.js"
  data-channel="your-channel-id"
  async
></script>
Add this snippet to your website’s HTML – in the <body> tag, ideally before the closing </body>. The widget loads asynchronously and won’t block your page.
Where to add it:
- In your site’s global template or layout file (to show on every page)
- On specific pages only (to limit where the widget appears)
- In your CMS’s custom code/scripts section
The widget appears as a floating bubble in the corner of the page. Clicking it opens the chat panel.
Deploying a Chat Link
Create the Channel
- Go to Channels → Add Channel → Link
- Name it (e.g., “Public Chat” or “Beta Testers”)
Configure Access
On the Settings tab:
- Password protection – Toggle on to require a password. The platform auto-generates a 12-character password. You can regenerate it anytime.
- Step display and Rate limits – Same as embed channels
Share the Link
Your chat link URL follows the pattern:
https://c.platform.softcery.com/chat/your-channel-idShare it however you want:
- Email it to beta testers
- Post it in Slack
- Add it to your email signature
- Include it in documentation
- Link to it from your website
If password-protected, users see a branded entry screen where they enter the password before chatting.
Multiple Channels, One Agent
A single agent can have up to 20 channels. Common setups:
By context:
- “Homepage Widget” – embed on your marketing site, branded with marketing colors
- “Docs Widget” – embed on your docs site, branded with docs theme
- “Internal Chat” – password-protected link for your team
By audience:
- “Public Support” – embed, open access, step display: none
- “Beta Testers” – link, password-protected, step display: detailed
- “Partner Access” – link, password-protected, different branding
Each channel is independent – different branding, different settings, same agent intelligence.
Testing Before Launch
-
Admin preview – Use the built-in preview panel to test conversations with your branding applied. No deployment needed.
-
Password-protected link – Create a link channel with password protection. Share with your team for feedback before public launch.
-
Staging site embed – If you have a staging environment, add the embed snippet there first. Test the widget in context – alongside your real content, navigation, and styling.
-
Check on mobile – The chat widget is responsive, but test it on actual mobile devices to verify sizing and positioning work with your site layout.
What to Test
- Greeting behavior (first message from the agent)
- Common questions your users will ask
- Edge cases (off-topic, aggressive, gibberish)
- Multi-turn conversations (does context carry properly?)
- Branding appearance (colors, logo, fonts render correctly)
- Step display (does minimal/detailed look right for your use case?)
- Rate limits (do they kick in at the right threshold?)
After Launch
Monitor
- Check the dashboard daily for the first week
- Review conversations to see how real users interact
- Watch the success rate – is the agent helping?
Iterate
- Branding adjustments take effect immediately – no redeployment
- Behavior changes (prompts, model, settings) apply to the next conversation
- Knowledge updates (new sources, deleted sources) take effect after processing
Common First-Week Adjustments
- Welcome message too long or too short
- Bubble icon doesn’t match the site’s design language
- Step display set too high (users confused by “Searching…” indicators) or too low (users think the bot is frozen)
- Rate limits too strict (legitimate users hitting limits) or too loose
- Missing knowledge sources for common questions
Tips
- Match your site’s design language. The chat widget is a part of your user experience. If your site uses rounded corners and soft colors, configure the panel and bubble to match. A jarring widget looks like an afterthought.
- Keep the welcome message under two sentences. Users want to ask their question, not read a paragraph first.
- Use “Minimal” step display for most customer-facing channels. Users appreciate seeing that the bot is working (searching, thinking) without being overwhelmed by technical details.
- Password-protect during testing. Even if the channel will eventually be public, start with a password so you control who sees it while you’re still tuning.
- Create channel-specific welcome messages. Your docs site widget should say something different than your marketing site widget. “Ask me about our API” vs. “Want to learn what Acme can do for you?” – same agent, different entry points.