Creating and Managing Agents
Last updated on February 27, 2026
Softcery PlatformWe build and advise on production AI systems. Bring your questions to a free intro call.
Talk to usBuild and deploy reliable AI agents with the Softcery Platform.
Get startedEvery AI agent on the Softcery platform starts here. An agent is the top-level container for everything – behavior configuration, knowledge sources, evaluations, integrations, channels, and conversations all belong to a single agent.
You can create multiple agents, each serving a different purpose. A website Q&A bot, a customer support agent, a lead capture chatbot – each gets its own configuration, its own knowledge, its own deployment.
Creating an Agent
Click “Create Agent” from the sidebar or dashboard. Give it a name and a description. That’s it – your agent exists.
The platform immediately sets up everything your agent needs:
- A default Chat Link channel (password-protected) so you can start testing right away
- A blank behavior configuration ready for prompts and model selection
- Empty slots for knowledge sources, evaluations, and integrations
From the moment you create an agent, you can start configuring and testing it. The default channel means you don’t have to set up deployment before you can see your agent in action.
The Agent Dashboard
Each agent has a dashboard that shows you everything at a glance.
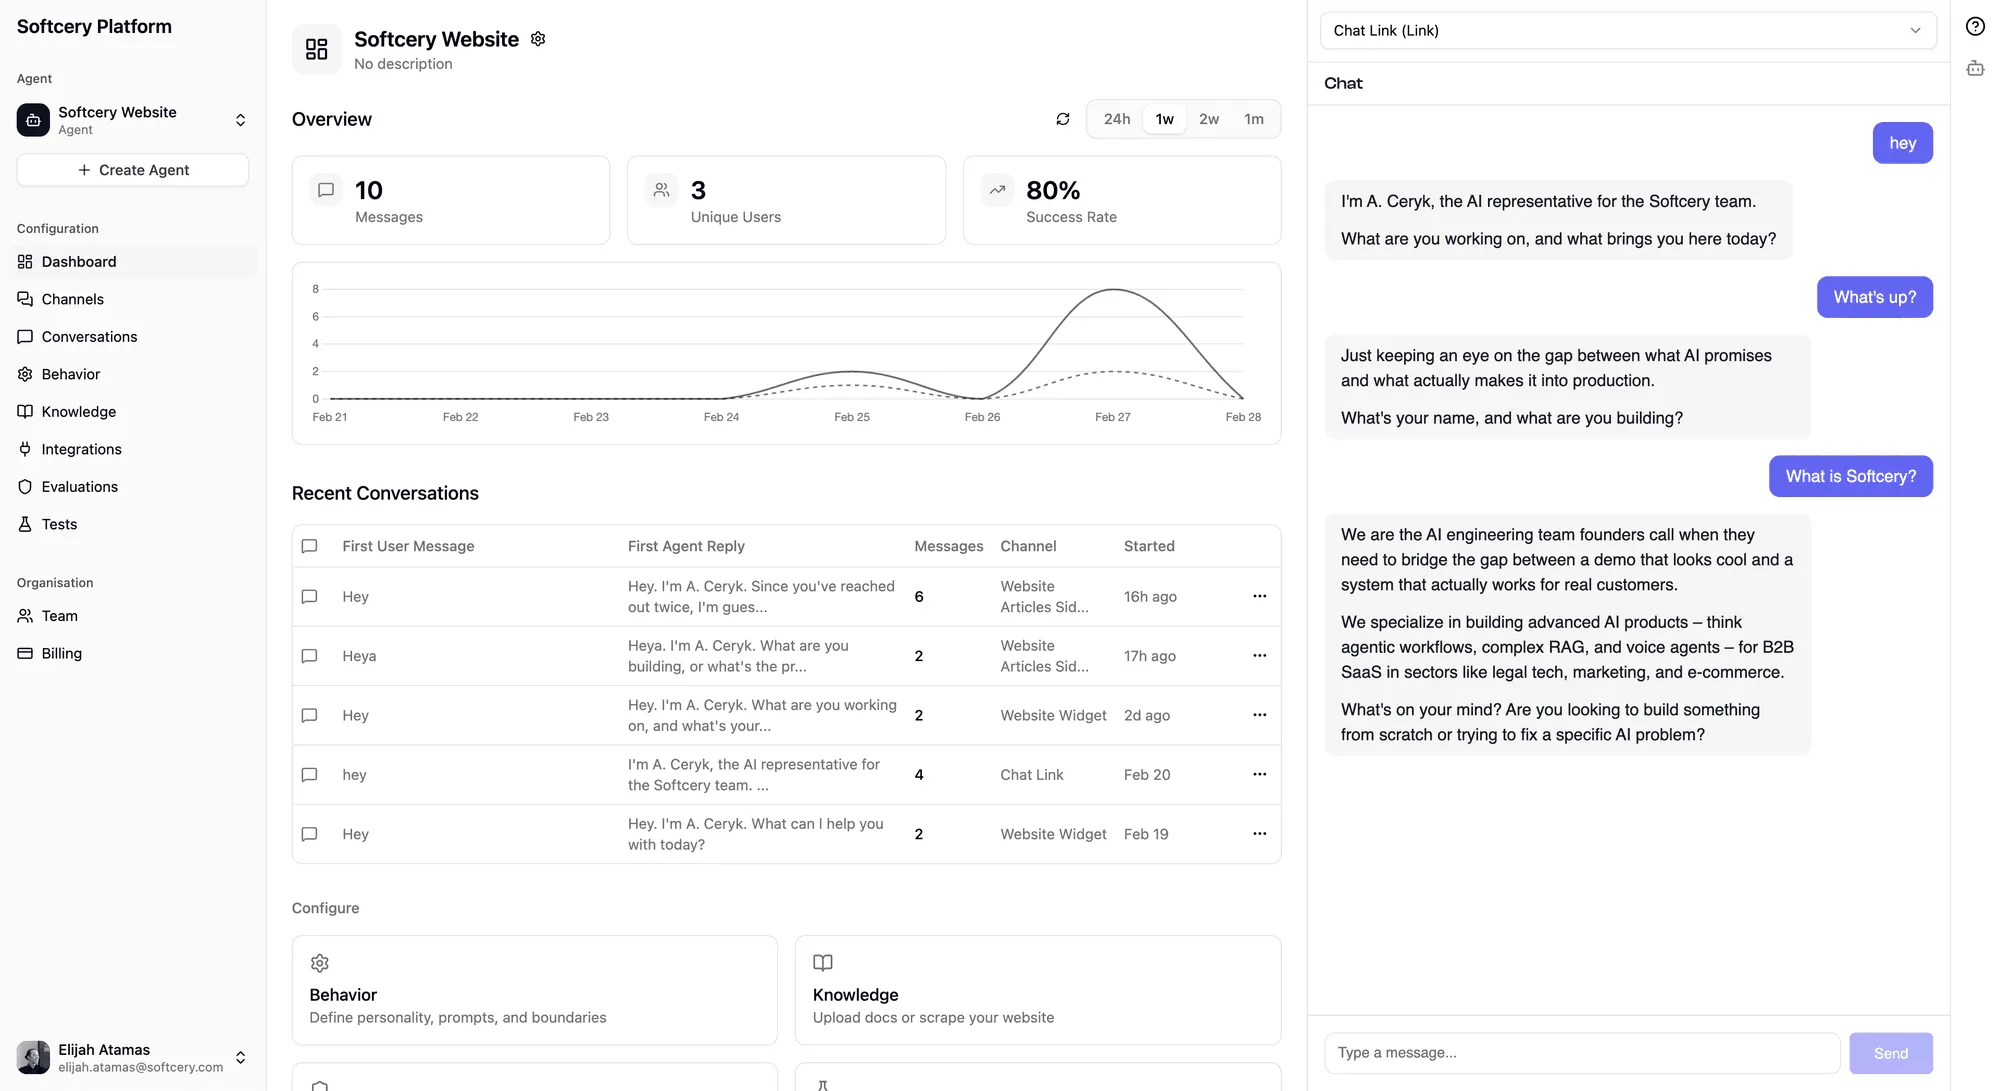
Real-Time Stats
The stats section shows key metrics over a configurable time period (24 hours, 1 week, 2 weeks, or 1 month):
- Messages – Total messages exchanged between users and your agent
- Unique Users – How many distinct people have talked to your agent
- Success Rate – What percentage of responses actually helped the user, measured by the built-in success evaluation
A time-series chart plots messages and unique users over time, so you can see trends and spot anomalies.
Recent Conversations
Below the stats, you see recent conversations with a quick summary: which channel, how many messages, and the agent’s first reply. Click any conversation to see the full exchange.
Configuration Cards
Quick-access cards link to each configuration area – Behavior, Knowledge, Channels, Evaluations, and Tests. Each shows a brief status so you know where things stand.
Editing an Agent
Click the gear icon on the dashboard to edit your agent’s name or description. These are metadata – changing them doesn’t affect how your agent behaves or what it knows.
Cloning an Agent
Sometimes you want a copy of an existing agent as a starting point. Clone creates a full deep-copy:
- All behavior configuration (prompts, model selection, advanced settings)
- All knowledge sources (including file copies – each clone gets its own files)
- All channels (with their branding and settings)
- All evaluations (criteria, thresholds, actions)
- All test cases
The clone is completely independent. Modifying the original doesn’t affect the clone, and vice versa.
Knowledge sources in the clone are set to “pending” and reprocessed automatically – the clone gets its own embeddings and vector store entries, not shared references to the original.
To clone, use the gear menu on the agent dashboard or the agent switcher in the sidebar.
Deleting an Agent
Deleting an agent removes everything associated with it – conversations, messages, channels, knowledge sources (including stored files and embeddings), evaluations, test cases, test runs, and all configuration versions. This is permanent.
The delete modal asks for confirmation because this operation cascades through every related entity. There’s no undo.
Switching Between Agents
The sidebar shows your current agent and lets you switch between all your agents. Click the agent name in the sidebar to open the switcher, which lists every agent in your account with quick actions for cloning or navigating to a specific agent’s dashboard.
What’s Inside an Agent
An agent is composed of several configurable pieces:
| Component | What It Does |
|---|---|
| Behavior | Prompts, personality, model selection, advanced settings |
| Knowledge | Documents, text, and websites the agent draws from |
| Evaluations | Quality criteria every response must pass |
| Integrations | External tools the agent can use (MCP servers) |
| Channels | Where and how the agent is deployed |
| Tests | Test questions with expected behavior for batch evaluation |
Each component is covered in detail in its own article. All of these belong to a single agent and work together – the knowledge informs behavior, evaluations enforce quality, integrations extend capabilities, and channels deliver the experience.
Ownership and Access
Every agent belongs to a single user. You can only see, edit, and manage agents you’ve created. All operations are ownership-verified on the backend – it’s not just a UI restriction.
Multi-user organizations and shared agent access are on the roadmap but not yet available.
Tips for Working with Multiple Agents
- Start with presets. Use the behavior presets (Company Representative, Customer Support, Sales Lead Gen, Knowledge Base Assistant) as a foundation, then customize.
- Clone and iterate. Want to test a different behavior approach? Clone your agent, make changes to the copy, and compare results side by side.
- One agent per purpose. Rather than overloading a single agent with knowledge about everything, create focused agents with specific knowledge bases. A support bot and a sales bot serve different conversations – give them different configurations.
- Name descriptively. When you have several agents, clear names save time. “Acme Support Bot” is better than “Agent 1.”